Shipping within 21 business days
Check out all our European shipping rates
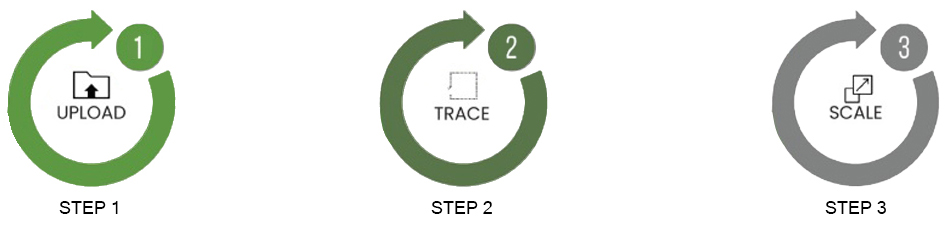
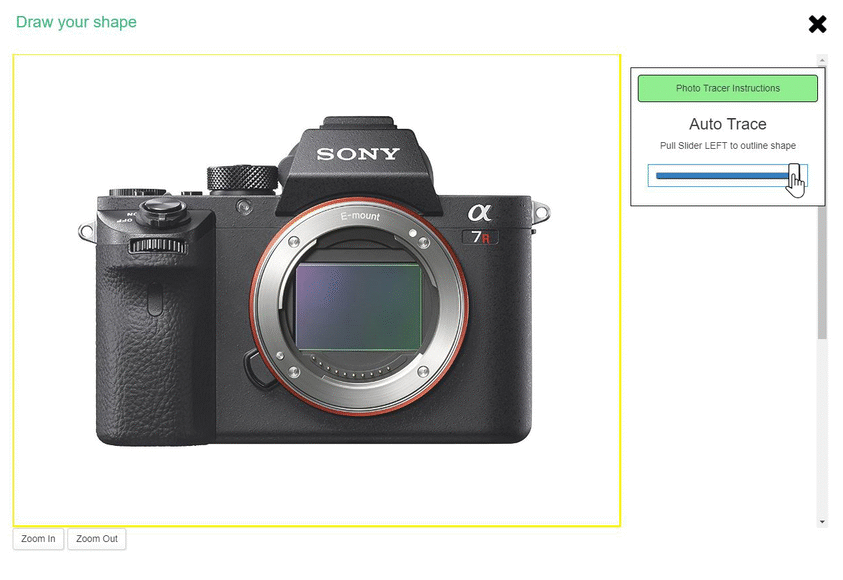
The MyCaseBuilder Photo Tracer allows you to upload a photo and turn it into the perfect custom shape.
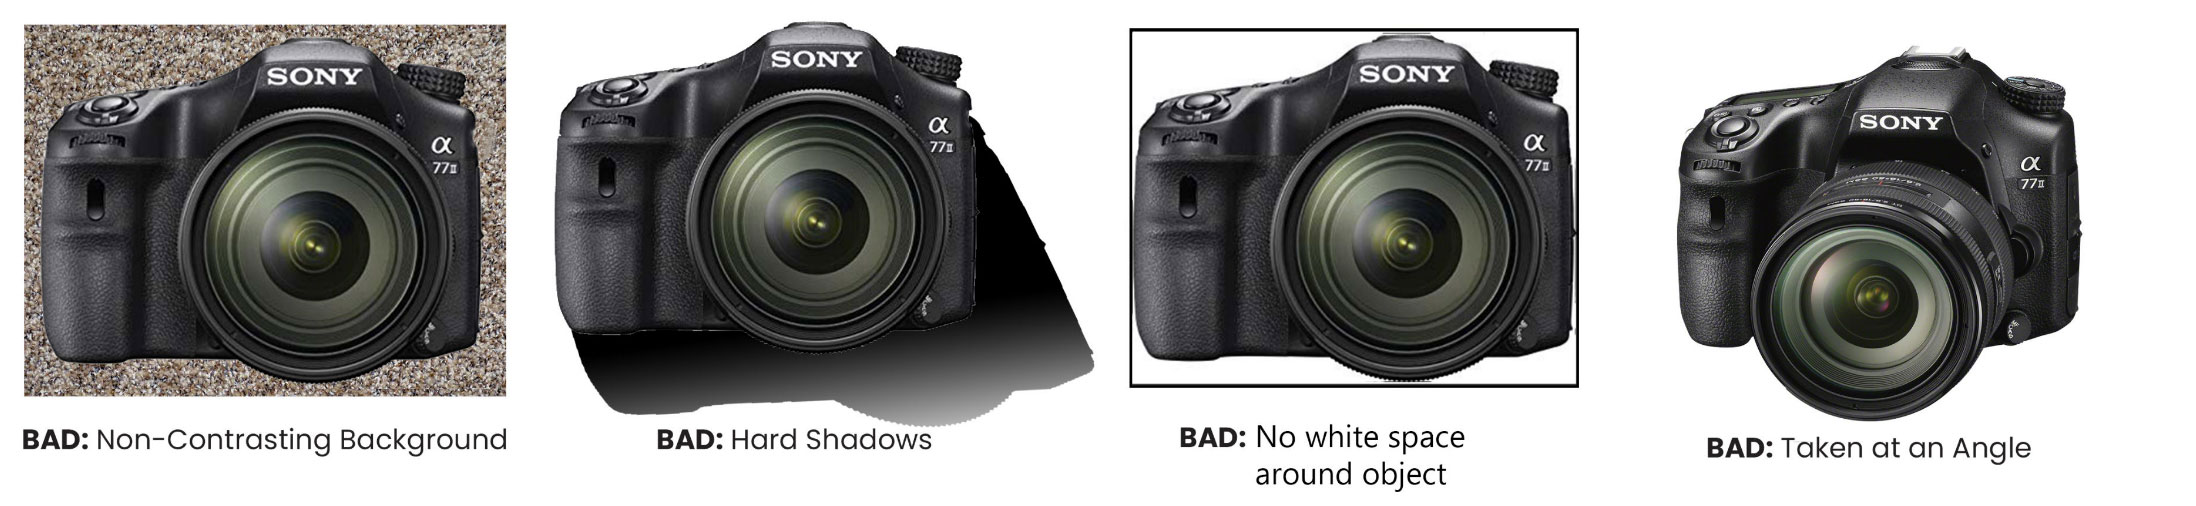
THESE AREN'T PERFECT:
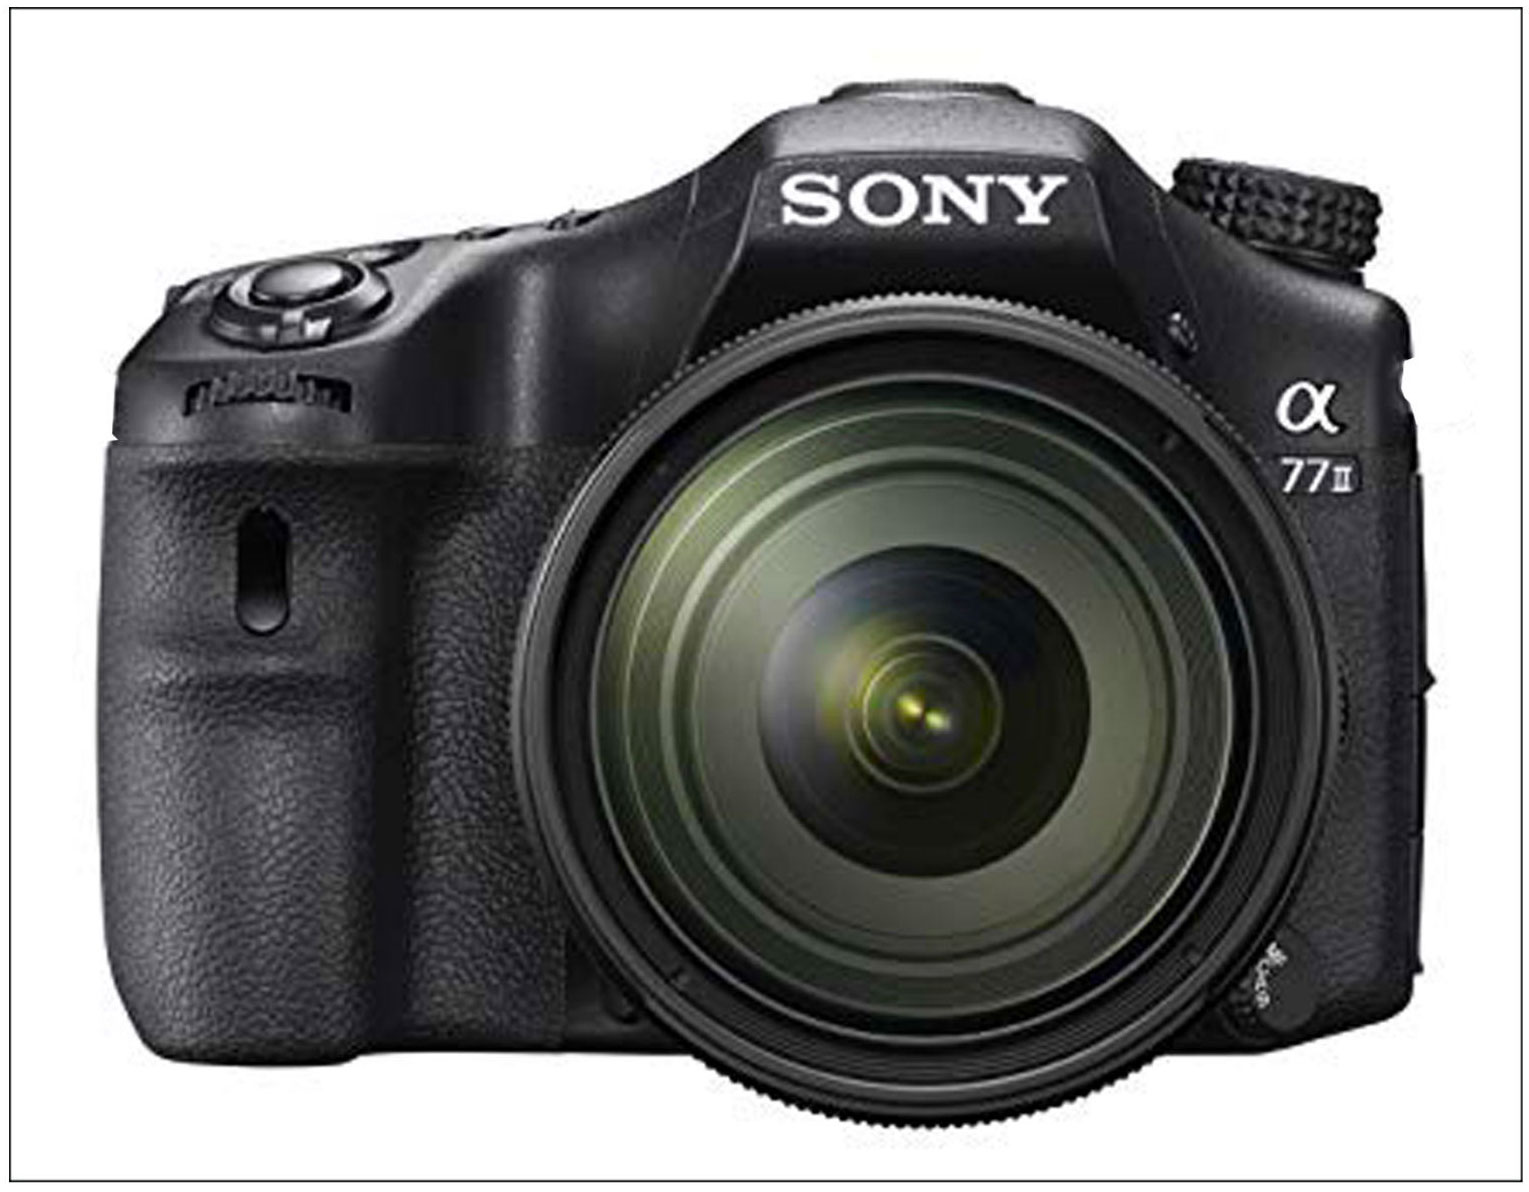
TIP: If you have a tall item, you must rotate your photo by 90 degrees so that the item's longest dimension is left-to-right. This will ensure accurate scaling.
Example: A tall item that has been rotated for proper scaling.
2 TRACE:
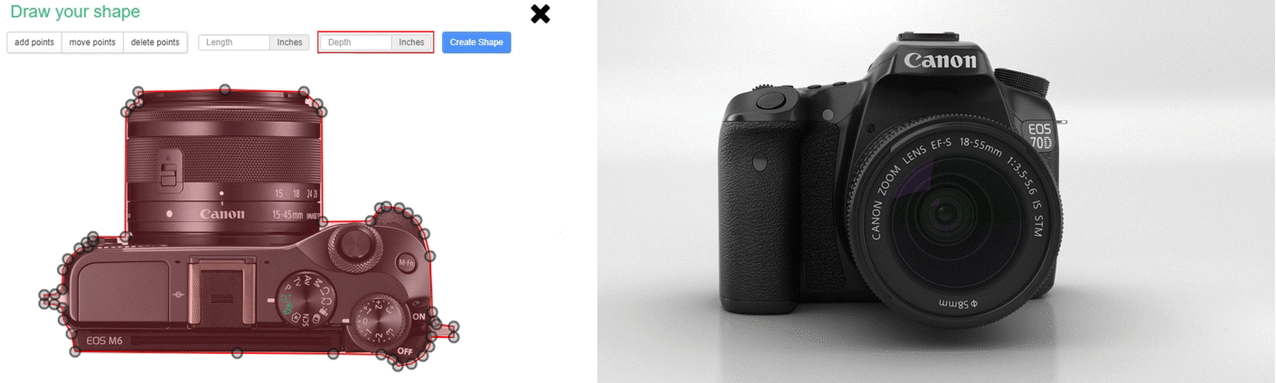
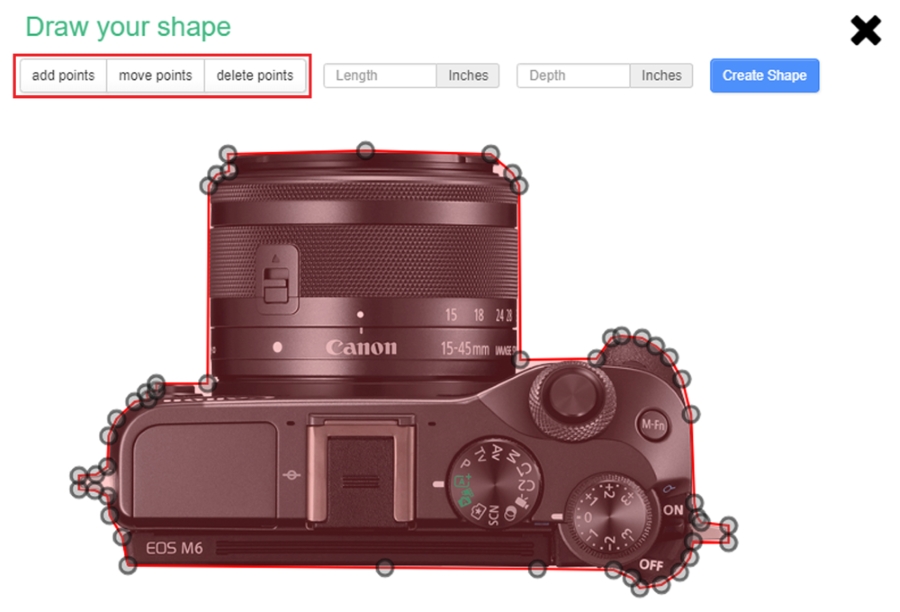
ii. Manual Tracing
Here, tracing is done using point-to-point lines - connect your traced line to the starting point to close your shape.
Manual Tracing can be activated if Auto Tracing is unable to generate a shape.
To activate Manual Tracing move the slider to left and click on Start Manual Trace.
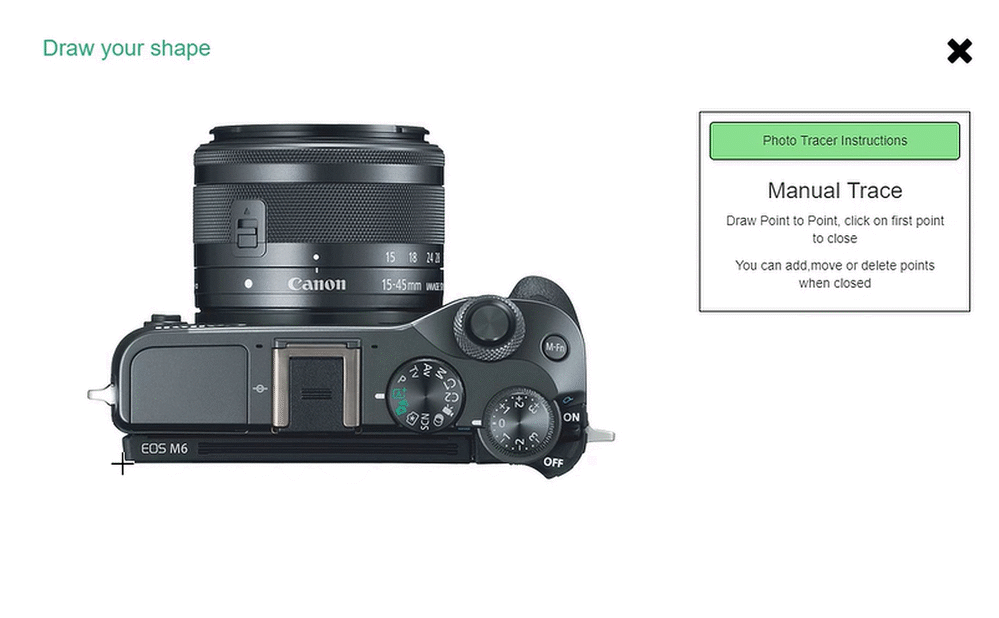
Edit with the Add Points, Move Points, and Delete Points buttons.
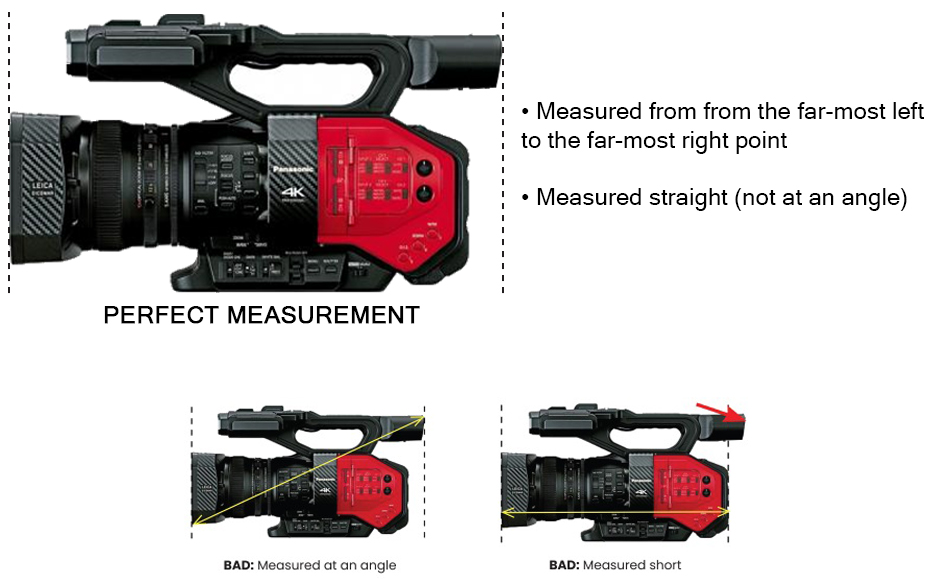
Scale by adding in the length.
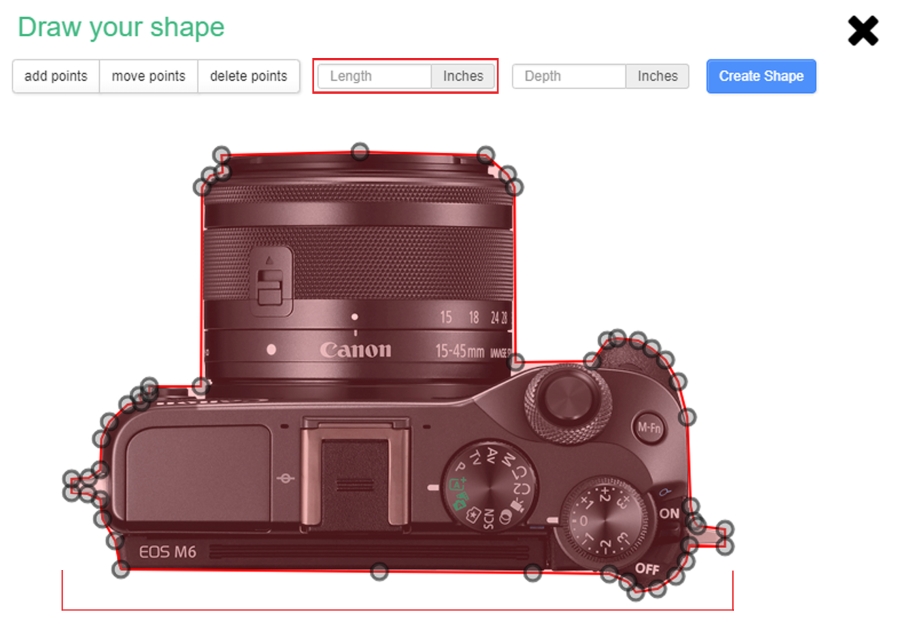
Scale by adding in the depth.